Buy Tobacco Leaf Online | Whole Leaf Tobacco

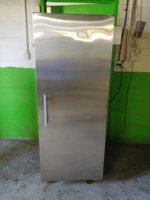
Tobacco Kiln/Hard Cider-Beer fermentation chamber

Status
Not open for further replies.

ChinaVoodoo

Moderator
Joined
Sep 1, 2014
Messages
7,183
Points
113
Location
Edmonton, AB, CA
Plastics may spontaneously sag and deform under gravity, at temperatures well below the melting point.

Bob

If it sags, it's because it's too thin and not insulating well. The outside of the wall should be closer to room temperature.
AND not framed with anything to support it, or not framed at all.

I could see unsupported 1" foam sagging at high temperatures. My kiln has no reinforcing frame at all, but since it's 3" foam, the inside temperature might be 165, but the outside temperature is 60, and I still have, just a guess, 2" of foam thickness which is well below the operational temperature.

Are you using spray foam? I've had issues with it tainting tobacco. I suggest thing a dry run with an entire box of baking soda spread out on the floor.
 

Paraord

Well-Known Member
Joined
May 8, 2017
Messages
100
Points
28
Location
Western NY
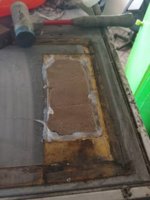
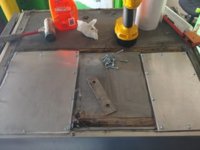
Nope, I opted for no spray foam. Just reusing the polystyrene foam insulation that was on top of the refridgeration unit. I sealed the 2 holes inside with 450F silicone gasket around sheet metal. Then each sealed off cavity got that exsisting foam, and topped externally with another piece of sheet metal and silicone gasket.

FANSlM9m.jpg

uuEO0Num.jpg

Not sure if I will top the whole thing with a larger piece of sheet metal and bend down an overlap or do a piece of blue foam THEN the sheet metal, or nothing at all for the top.

I was planning when its all done to give er a week to see how it goes and ensure all out gassing is done. Might do the baking soda trick too
 

Paraord

Well-Known Member
Joined
May 8, 2017
Messages
100
Points
28
Location
Western NY
I just ordered the fan speed controller and the bathroom fan which will be used for air circulation as others have also done.

Today I'll be making that "cap", but I think ill opt for no additional insulation on top at this point. Its pretty darn thick as it is. That said I will be leaving a 5" leg on either side of the cap piece which in case at a later date I decide to put a 2" piece of foam there I have plenty of leeway to re-attach the cap over additional insulation.

Ill follow up on some more pictures this afternoon after the next round of progress.


For wiring everything up I am thinking the best course of action will be a heavy input line to a terminal block and distribute from there. This would power the fan and PID/Crockpot setup. Not sure if I will be able to fit the additional fan speed control inside a CPU power supply box as well as the PID but we will see! Hopefully Ill get the PID on order next week.
 

Paraord

Well-Known Member
Joined
May 8, 2017
Messages
100
Points
28
Location
Western NY
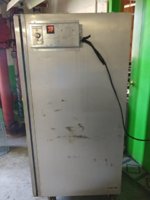
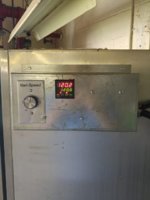
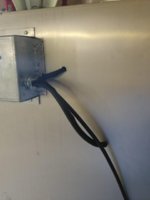
The past few days were a little crazy so I didnt get back to the project as much as I wanted but I bent up a "control box" to mount my PID/Fan control/Temp-Hygrometer all to which will run off the same AC input via terminal block.
Anyone know of an AC powered hydrometer? Everything Ive found so far is battery.

The fan and fan speed control came in yesterday. Ill order the PID next week, in the mean time Ill use my PID controller from my lead furnace to put cuts in the "control box".
 

Paraord

Well-Known Member
Joined
May 8, 2017
Messages
100
Points
28
Location
Western NY
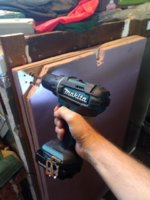
Heres a picture of the control box with the fan speed control mounted, as well as the hole for the PID put in. I just pulled the PID off of my lead furnace for the sake of making progress.
I also got the fan and trimmed off the one side of the guard so it will sit flat.

Still looking for a hygrometer.

4CBcgXZl.jpg

fhEhq1Zl.jpg

sVuyibKl.jpg

wNTTSzQl.jpg

Not sure why I put a little extra piece if duct work on the exhaust. It fit, so I put it there, no real reason other than that.


Do you guys find it necessary to do anything other than add water when needed after introducing air movement into the kiln, like rotate racks around, or is it more a set it and let it run its course for 4-6 weeks?
 

deluxestogie

Administrator
Staff member
Joined
May 25, 2011
Messages
24,013
Points
113
Location
near Blacksburg, VA
Do you guys find it necessary to do anything other than add water when needed after introducing air movement into the kiln, like rotate racks around, or is it more a set it and let it run its course for 4-6 weeks?
Being generally lazy, I just water it until the run is completed. I estimate when the water will run out, mark a dot on my calendar, and add more when due. Depending on the time of year (ambient temp for the kiln), I need to add more water to the Crockpot every 3 to 5 days.

Bob
 

Paraord

Well-Known Member
Joined
May 8, 2017
Messages
100
Points
28
Location
Western NY
.....Depending on the time of year (ambient temp for the kiln), I need to add more water to the Crockpot every 3 to 5 days.

Bob

Do you leave the lid on or off? Or is it just a trial and error kind of thing as to the amount of lid off exposure? I think I am going to end up just going with a battery operated hygrometer probe like this one. I am having no luck finding one to operate off of AC.

https://www.amazon.com/Thermometer-...d=1522199168&sr=8-1&keywords=hygrometer+probe

Sound good?
 

deluxestogie

Administrator
Staff member
Joined
May 25, 2011
Messages
24,013
Points
113
Location
near Blacksburg, VA
For several years, I fiddled with the placement of the Crockpot lid. I was aiming for 75% RH. It turns out that the RH doesn't matter, so long as the kiln is well sealed, and well insulated, and the RH is above about 60%. If there is any water in the Crockpot, then the natural cycling of its power easily keeps the RH above that lower limit.

Having a hygrometer is educational. But when it goes belly up, you may comfortably do without it. Unless you have a separate, PID-controlled humidification device, you really exercise no control over the RH.

Bob
 

Paraord

Well-Known Member
Joined
May 8, 2017
Messages
100
Points
28
Location
Western NY
Having a hygrometer is educational. But when it goes belly up, you may comfortably do without it. Unless you have a separate, PID-controlled humidification device, you really exercise no control over the RH.

Bob

So best not to even drill the hole. Got it. I might throw one inside for the heck of it but I wont lose any sleep not drilling and fitting one in to my setup. Thanks Bob
 

Paraord

Well-Known Member
Joined
May 8, 2017
Messages
100
Points
28
Location
Western NY
no real progress, I am melting some lead soon and that'll fund the PID among other things. Once the PID comes then I can wire everything up and finish the project.

Strange question, has anyone dried hops? Nothing like getting the most out of a specialized piece of a equipment. I have about a dozen telephone poles that Ive been toying with the idea of setting a few up for hops. Thought just hit that this could also potentially dry hops for processing. But then again how would one get the moisture out of the sealed kiln? Maybe I'm just rambling
 

Paraord

Well-Known Member
Joined
May 8, 2017
Messages
100
Points
28
Location
Western NY
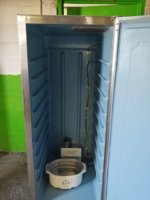
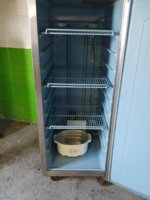
And here we are. Only a few weeks later LOL. As you can tell I have been side tracked by multiple other obligations and hobbies. But without further adieu here is the complete, fully operational death star. Er, tobacco kiln/booze fermentation chamber.

hupOs1bl.jpg

gm4qqv6l.jpg

Fjx3H9Fl.jpg

uMcIzQKl.jpg

Uq38TSJl.jpg

9qvS57Yl.jpg

And its now nicely situated in my basement, awaiting its first tobacco leaves to kiln which are ready when I have a racks worth. My apologies for the delay in the project for anyone following, but as I finished it today I wanted to make sure I updated.
 

deluxestogie

Administrator
Staff member
Joined
May 25, 2011
Messages
24,013
Points
113
Location
near Blacksburg, VA
That looks wonderful. I worry, though, about all that blue plastic. I would suggest a tobaccoless run, up to temperature for a day or more, for outgassing of the plastic, and to verify that it doesn't soften too much.

Bob
 

Paraord

Well-Known Member
Joined
May 8, 2017
Messages
100
Points
28
Location
Western NY
That looks wonderful. I worry, though, about all that blue plastic. I would suggest a tobaccoless run, up to temperature for a day or more, for outgassing of the plastic, and to verify that it doesn't soften too much.

Bob


I ran it for 3 days straight at work up to temp with no loss in rigidity before bringing it home. I can do it again though. No harm in it right? I only ran it to 120F
 

deluxestogie

Administrator
Staff member
Joined
May 25, 2011
Messages
24,013
Points
113
Location
near Blacksburg, VA
CV, could you please clarify. When you state "sealed brewing primary" as an object, that seems to describe a process (as a qualifying phrase to a missing noun). Can you post a photo of a "primary"? I'm imagining a medieval glass retort, with the end of the condensing arm somehow plugged. Is it just a Mason jar with a fancy lid?

Bob
 

ChinaVoodoo

Moderator
Joined
Sep 1, 2014
Messages
7,183
Points
113
Location
Edmonton, AB, CA
CV, could you please clarify. When you state "sealed brewing primary" as an object, that seems to describe a process (as a qualifying phrase to a missing noun). Can you post a photo of a "primary"? I'm imagining a medieval glass retort, with the end of the condensing arm somehow plugged. Is it just a Mason jar with a fancy lid?

Bob

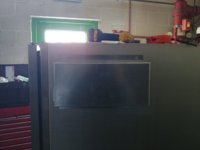
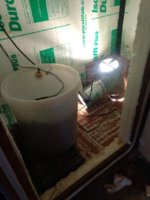
Here is the kiln. It's 3" foam and has a wood door frame. It's glued and taped together.
IMG_20180818_174909946-800x600.jpg

The door is screwed shut, but does have a hinge.
IMG_20180818_174931058-600x800.jpg

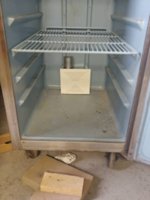
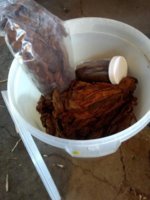
The floor is tile. The heater is a light bulb on a controller, plus a duct fan that cools the bulb and circulates the air. The primary, which is basically an 8 gallon food grade bucket is raised a couple inches off the floor because it sits on a 1020 basket.
IMG_20180818_175028311-600x800.jpg

There is hands of tobacco inside, as well as a bag and a jar.
IMG_20180818_175209601-600x800.jpg

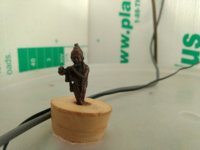
There is a hole in the lid, but it's plugged with a bung (necessary), and Krishna (optional).
IMG_20180818_175351676-800x600.jpg
 

deluxestogie

Administrator
Staff member
Joined
May 25, 2011
Messages
24,013
Points
113
Location
near Blacksburg, VA
Thank you. Now I understand the arrangement. It makes a 5 gallon bucket an interesting possibility. Why is the bung required? Or for that matter, the lid on the primary?

Bob
 

ChinaVoodoo

Moderator
Joined
Sep 1, 2014
Messages
7,183
Points
113
Location
Edmonton, AB, CA
Thank you. Now I understand the arrangement. It makes a 5 gallon bucket an interesting possibility. Why is the bung required? Or for that matter, the lid on the primary?

Bob

It is required because with the good seal on the bucket, which is difficult to maintain with the box as a whole, the tobacco maintains a constant moisture level.
 
Status
Not open for further replies.
Top