Buy Tobacco Leaf Online | Whole Leaf Tobacco

Fire Curing Attempt: ChinaVoodoo

Status
Not open for further replies.

ChinaVoodoo

Moderator
Joined
Sep 1, 2014
Messages
7,188
Points
113
Location
Edmonton, AB, CA
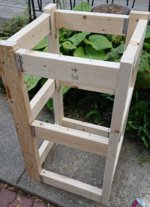
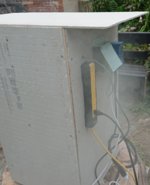
I built a box last night for fire curing. I'm not sure I'm happy with it. I'll explain. I'm currently running it for the first time.
I built a box for less than $50 (CAD).

4-2x4s

12 brackets

2 - 1/4" 60x36" cement boards


The cement board was cut into 5-20x36" pieces, 1-20x20" piece, and 1 leftover 16x20"


The wood was cut into four 36" long pieces, and twelve 15" pieces.


The boards turn 90° on the corner to maintain 20" per side. (3.5+1.5+15)
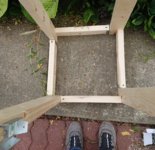
DSC_0360~2.JPG

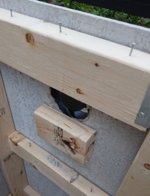
The brackets are only nailed onto the 1.5" sides. Screws are used for the other corners.
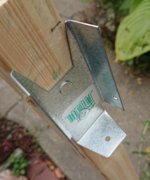
DSC_0361~2.JPG

The top rungs are not all the way to the top to allow for hanging.
DSC_0362~2.JPG

DSC_0363~2.JPG

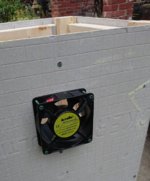
A hole is made for the fan
DSC_0364~2.JPG
DSC_0365~2.JPG


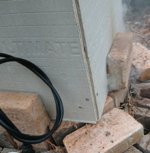
Holes drilled in the bottom which is the 50x20" piece
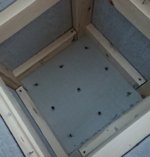
DSC_0368~2.JPG

The 5th 20x 36" is a loose lid which extends over four rain protection.
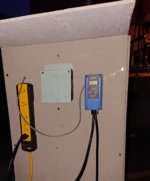
DSC_0372~2.JPG
 

ChinaVoodoo

Moderator
Joined
Sep 1, 2014
Messages
7,188
Points
113
Location
Edmonton, AB, CA
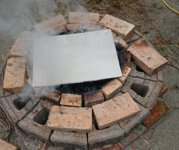
I started a fire with charcoal and then added prunings to the fire and put the extra piece of cement board on top to snuff it out.
DSCPDC_0003_BURST20200913110701308_COVER~2.JPG
DSC_0380~2.JPG

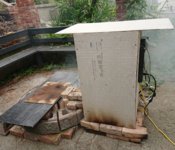
Then I loaded the tobacco, removed the extra piece of cement board and put the whole thing on top of the fire.
DSC_0376~2.JPG


The prunings burned too well, and the fire pit was not sealed enough so the fire got too hot.
DSC_0378~2.JPG
DSC_0381~2.JPG


I removed the box, let the prunings burn down, added another layer of brick to the fire pit to seal it a bit better. It still leaks, but currently the temperature is maintaining. It is set for 44°C/110°F. The range for fire curing is 110°F to 115°F. I'm cycling between 39°C and 44°C = 101° and 111°F, so I think I'll turn the set point up. I expected it to climb after reaching 44°C, but it doesn't. Overall, I think the lesson I learned is to feed it with wood, not twigs. I think it would be better overall to have the fire in a separate pit with a tube feeding the smoke over so I don't have to lift the 70lb box on top of the pit.
 

Knucklehead

Moderator
Founding Member
Joined
Oct 18, 2012
Messages
12,196
Points
113
Location
NE Alabama
Looks like you’re just a tweak or two away from having it like you want it. Good job.

@johnlee1933 built a smoke house for cooking meat using the method you described earlier, with the smoke separate from the fire. Not sure if that would reach the temps you need but it was an interesting thread anyway.
 

deluxestogie

Administrator
Staff member
Joined
May 25, 2011
Messages
24,015
Points
113
Location
near Blacksburg, VA
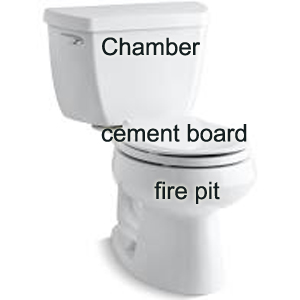
That should work well. Maybe move the chamber permanently just to the side of the pit, and elevate the chamber by a single (closed) course of bricks. Allow a direct passage between the pit and the underside of the box. Close the top of the pit with the extra cement board, which can be easily lifted or moved away for tending the fire.

Bob
 

ChinaVoodoo

Moderator
Joined
Sep 1, 2014
Messages
7,188
Points
113
Location
Edmonton, AB, CA
Looks like you’re just a tweak or two away from having it like you want it. Good job.

@johnlee1933 built a smoke house for cooking meat using the method you described earlier, with the smoke separate from the fire. Not sure if that would reach the temps you need but it was an interesting thread anyway.
I think that's the way to do it. Either that or build a fire pit that's actually sealed properly except for a single air intake. I ran a cold smoker that way, with a separate box, before.

I just had a flare up and it got up to 120°, so I've thrown bricks on top of the fire. Seems to be helping.
 

deluxestogie

Administrator
Staff member
Joined
May 25, 2011
Messages
24,015
Points
113
Location
near Blacksburg, VA
I've made a design drawing for you:

Toilet.jpg


Bob
 

deluxestogie

Administrator
Staff member
Joined
May 25, 2011
Messages
24,015
Points
113
Location
near Blacksburg, VA
If the lid of the pit is made of two layers of cement board, with a number of aligned holes drilled into them, then just shifting the top board can allow adjustment of the fire from closed to fully open, or anywhere in between. Or maybe just a sliding side vent (intake) on the fire pit.

Bob
 

Knucklehead

Moderator
Founding Member
Joined
Oct 18, 2012
Messages
12,196
Points
113
Location
NE Alabama
I started a fire with charcoal and then added prunings to the fire and put the extra piece of cement board on top to snuff it out.
View attachment 33220
View attachment 33223

Then I loaded the tobacco, removed the extra piece of cement board and put the whole thing on top of the fire.
View attachment 33219


The prunings burned too well, and the fire pit was not sealed enough so the fire got too hot.
View attachment 33221
View attachment 33222


I removed the box, let the prunings burn down, added another layer of brick to the fire pit to seal it a bit better. It still leaks, but currently the temperature is maintaining. It is set for 44°C/110°F. The range for fire curing is 110°F to 115°F. I'm cycling between 39°C and 44°C = 101° and 111°F, so I think I'll turn the set point up. I expected it to climb after reaching 44°C, but it doesn't. Overall, I think the lesson I learned is to feed it with wood, not twigs. I think it would be better overall to have the fire in a separate pit with a tube feeding the smoke over so I don't have to lift the 70lb box on top of the pit.
I forgot to mention, that is some gorgeous looking leaf.
 

ChinaVoodoo

Moderator
Joined
Sep 1, 2014
Messages
7,188
Points
113
Location
Edmonton, AB, CA
Yesterday, the fire took off again and settled at 134°F for a couple hours. I decided to just leave it and see. The tobacco lowest in the box still needs to stem dry, but this is what it looks like. Delhi-34 light fire cured:

DSC_0389~2.JPG

Today, I changed the configuration according to the toilet blueprint. It required bashing out a bigger hole in the severely cracked bottom, for the air to draw properly.
DSC_0390~2.JPG
 
Status
Not open for further replies.
Top