Rigging a Variable Speed Fan
If I ever use the Endo Kiln for flue-curing, it will need a fan. The kiln's present use may benefit from better distribution of heat and humidity, though I'm not sure of that.
Knucklehead purchased a bathroom fan for his kiln. This is a wonderful approach, since a bath fan is designed for use in damp (not wet) conditions. But they are pricey. They are also powerful enough to damage tobacco, and need to be regulated by a fan speed controller, for use in a kiln.
I stumbled into the cheapest bath fan offered at Lowe's--and it was also on clearance. So, for about $10, I bought a 55 watt, puny bath fan. The least expensive digital fan controller also ran about $10 (Lutron Rotary 1.5-Amp 600-Watt Rotary Ceiling Fan Control-Model #: FS-5FH-DK). For housing the controller, I bought a heavy PVC circuit box and face plate.
.
The plastic grill that comes with the bath fan can't be used in the kiln. Likewise, a plastic flow director and baffle that clips onto the fan exhaust could not align to my purpose, and was removed.
The air intake is through the motor armature, and the exhaust is out the side. Since the fan will be hung sideways, as oriented in the top image, I modified an HDPE mushroom box (from the grocery store) to redirect the outflow upward. The deflector was attached using the same Tyvek tape that I used to seal the interior of the kiln.
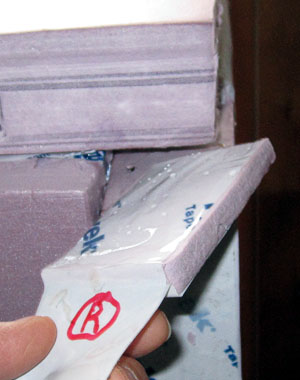
I will hang it from the lower shelf in the kiln (when the current kiln run ends in 2 weeks) using the homemade wire hooks, shown in the first image inserted into strips of leftover silicone door gasket--to minimize vibrational noise. Since I had to connect a section of extension cord (including a plug) to the fan wire, where it will be exposed to kiln conditions, I wrapped the splice in vapor-proof Tyvek tape.
The input and output wires were passed from the outside, through the conduit nipple on the circuit box, then the connections were made. The
hot wire of the incoming extension cord goes into and out of the digital speed control. The
neutral of the incoming extension connects directly to the neutral of the outgoing extension.
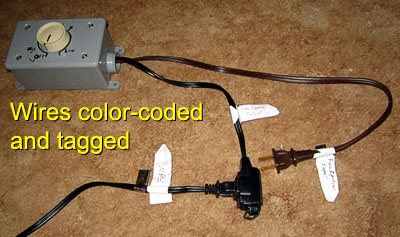
Since my kiln already supplies an unswitched (normal) outlet that is brown, I used a brown male end for the fan control input. In order to color code the increasing number of extension wires, plugs and outlets, I selected a black extension for the fan control output (female), and used its male end as the power cord for the fan. I also made up Tyvek tags for each male and female cord on these new items, as well as for the temp-switched and unswitched wiring already on the kiln.
I hope for this to be dummy proof, with color coding and identity tags.
After the controller and fan were connected to power (for a test on my front porch, so I could kick it down the steps if it burst into flames), I verified the rotary positions of OFF, HIGH, MED, LOW--it's actually continuously variable--and the position that seemed to provide a Goldilocks setting for my application, and marked these onto the face plate with a Sharpie. Notice that I also taped the package tag from the fan controller onto the circuit box, so that I will remember what it is.
[Not shown, the rectangular light switch slot on the face plate required a little Dremel work to clear the rotary switch retaining nut. I also bent some of the aluminum tabs of the fan controller mount, at the top and bottom, to clear the 4 face plate screw holes.]
The fan control circuit box will be mounted aft of the temp control box, outside the kiln, using two deck screws. The fan power cord will pass through the existing hole in the XPS foam wall, and a second cord notch added to the XPS foam stopper for the hole.
Bob


